Giao diện - Tkinter - Listbox


Tkinter Listbox
Summary: in this tutorial, you’ll learn how to use the Tkinter Listbox widget to display a list of items.
Introduction to the Tkinter Listbox
A Listbox widget displays a list of single-line text items. A Listbox allows you to browse through the items and select one or multiple items at once.
To create a listbox, you use the tk.Listbox class like this:
listbox = tk.Listbox(container, listvariable, height)
Code language: Python (python)
In this syntax:
- The
containeris the parent component of the listbox. - The
listvariablelinks to a StringVar object. More explanation on this later. - The
heightis the number of items that the Listbox will display without scrolling.
Managing list items
To populate items to a Listbox, you first create a StringVar object that is initialized with a list of items. And then you assign this StringVar object to the listvariable option as follows:
list_items = StringVar(value=items) listbox = tk.Listbox( container, height, listvariable=list_items )
Code language: Python (python)
To add, remove, or rearrange items in the Listbox, you just need to modify the list_items variable.
Selecting list items
The selectmode option determines whether you can select a single item or multiple items at a time.
'browse'– allows a single selection.'extended'– allows multiple selection.
By default, the selectmode is 'browse'. The curselection() method returns a list of currently selected indices.
Binding the selected event
To execute a function when the selected items changes, you bind that function to the <<ListboxSelect>> event:
listbox.bind('<<ListboxSelect>>', callback)
Code language: Python (python)
Tkinter Listbox widget example
The following program displays a Listbox that contains a list of programming languages.
When you select one or more item, the program displays the selected ones on a message box:
import tkinter as tk from tkinter import ttk from tkinter.messagebox import showinfo # create the root window root = tk.Tk() root.geometry('200x100') root.resizable(False, False) root.title('Listbox') root.columnconfigure(0, weight=1) root.rowconfigure(0, weight=1) # create a list box langs = ('Java', 'C#', 'C', 'C++', 'Python', 'Go', 'JavaScript', 'PHP', 'Swift') langs_var = tk.StringVar(value=langs) listbox = tk.Listbox( root, listvariable=langs_var, height=6, selectmode='extended') listbox.grid( column=0, row=0, sticky='nwes' ) # handle event def items_selected(event): """ handle item selected event """ # get selected indices selected_indices = listbox.curselection() # get selected items selected_langs = ",".join([listbox.get(i) for i in selected_indices]) msg = f'You selected: {selected_langs}' showinfo( title='Information', message=msg) listbox.bind('<<ListboxSelect>>', items_selected) root.mainloop()
Code language: Python (python)
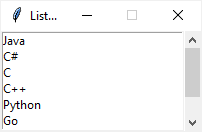
Output:

How it works.
First, create a StringVar that holds a list of programming languages:
langs = ('Java', 'C#', 'C', 'C++', 'Python', 'Go', 'JavaScript', 'PHP', 'Swift') langs_var = tk.StringVar(value=langs)
Code language: Python (python)
Second, create a new Listbox widget and assign the StringVar object to the listvariable:
listbox = tk.Listbox( root, listvariable=langs_var, height=6, selectmode='extended')
Code language: Python (python)
The height shows six programming languages without scrolling. The selectmode='extended' allows multiple selections.
Third, define a function that will be invoked when one or more items are selected. The items_selected() function shows a list of currently selected list items:
def items_selected(event): """ handle item selected event """ # get selected indices selected_indices = listbox.curselection() # get selected items selected_langs = ",".join([listbox.get(i) for i in selected_indices]) msg = f'You selected: {selected_langs}' showinfo( title='Information', message=msg)
Code language: Python (python)
Finally, bind the items_selected function with the '<<ListboxSelect>>' event:
listbox.bind('<<ListboxSelect>>', items_selected)
Code language: Python (python)
Adding a scrollbar to the Listbox
The following program illustrates how to add a scrollbar to a listbox:
import tkinter as tk from tkinter import ttk from tkinter.messagebox import showinfo # create the root window root = tk.Tk() root.geometry('200x100') root.resizable(False, False) root.title('Listbox') root.columnconfigure(0, weight=1) root.rowconfigure(0, weight=1) # create a list box langs = ('Java', 'C#', 'C', 'C++', 'Python', 'Go', 'JavaScript', 'PHP', 'Swift') langs_var = tk.StringVar(value=langs) listbox = tk.Listbox( root, listvariable=langs_var, height=6, selectmode='extended') listbox.grid( column=0, row=0, sticky='nwes' ) # link a scrollbar to a list scrollbar = ttk.Scrollbar( root, orient='vertical', command=listbox.yview ) listbox['yscrollcommand'] = scrollbar.set scrollbar.grid( column=1, row=0, sticky='ns') # handle event def items_selected(event): """ handle item selected event """ # get selected indices selected_indices = listbox.curselection() # get selected items selected_langs = ",".join([listbox.get(i) for i in selected_indices]) msg = f'You selected: {selected_langs}' showinfo( title='Information', message=msg) listbox.bind('<<ListboxSelect>>', items_selected) root.mainloop()
Code language: Python (python)
Output:
For more information on how to link a scrollbar to a scrollable widget, check out the scrollbar widget tutorial.
Summary
- Use the
tk.Listbox(container, height, listvariable)to create a Listbox widget; alistvariableshould be atk.StringVar(value=items). - Set the
selectmodeto'extended'to allow multiple selection; otherwise, use'browse'. - Bind a callback function to the
'<>'event to execute the function when one or more list items are selected.