ASP.NET Core - Bắt đầu tạo ứng dụng


Bắt đầu tạo ứng dụng trong ASP.NET Core
Tao một project
Để bắt đầu tạo một ứng dụng ASP.NET Core.
To start, you'll create an ASP.NET Core web application project. The project type comes with all template files to create a web app, before you've even added anything!
-
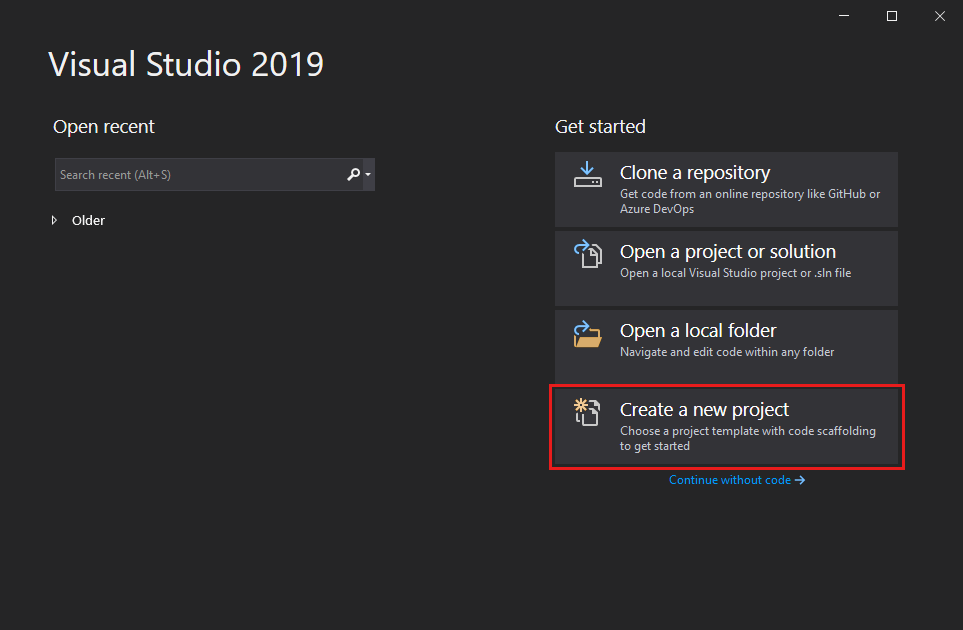
Mở Visual Studio.
-
Trên thanh start window, chọn Create a new project.
-
Trong cửa sổ Create a new project , nhập vào ASP.NET trong họp tìm kiếm. Tiếp theo, chọn C# , và sau đó chọn Windows.
Sau khi apply ngôn ngữ và lọc platform, chọn template ASP.NET Core Web Application, và kế tiếp chọn Next.
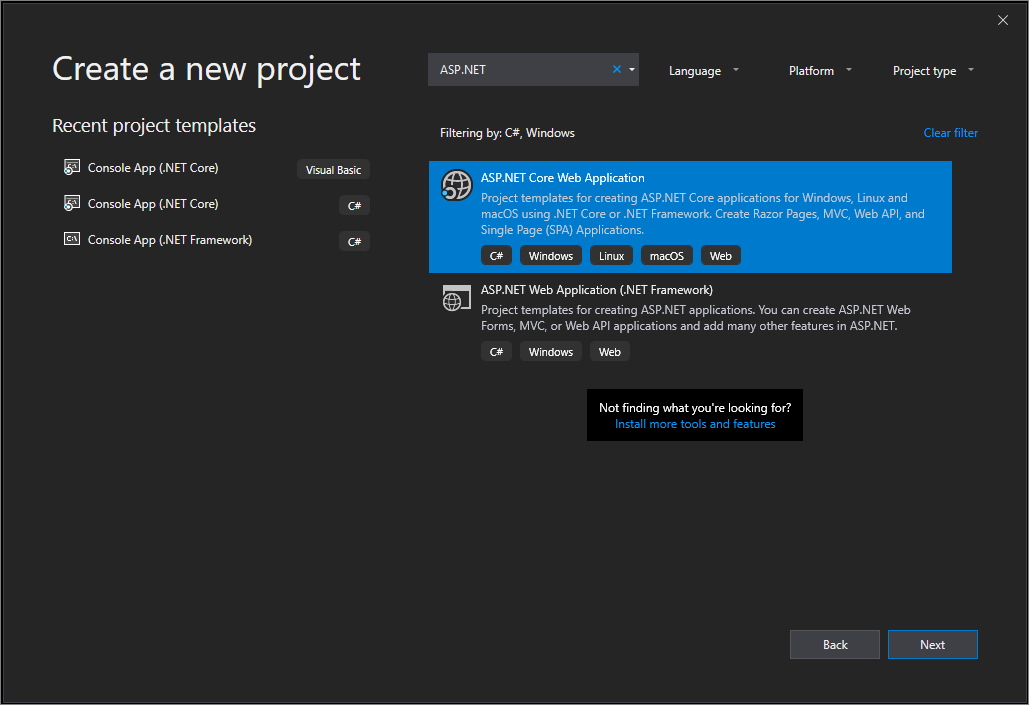
Nếu bạn không thấy template ASP.NET Core Web Application , bạn có thể cài đặt template từ Create a new project . trong Not finding what you're looking for? , chọn Install more tools and features .

Sau đó, trong Visual Studio Installer, chọn ASP.NET and web development .

Sau đó, chọn nút Modify trong Visual Studio Installer. Lưu công việc hành. Kế tiếp, chọn Continue để cài đặt. Sau đó, trở về bước 2 trong "Create a project" .
-
Trong cửa sổ Configure your new project , Nhập tên HelloWorld trong Project name . Sau đó, chọn Create.

-
Trong cử sổ Create a new ASP.NET Core Web Application , Xác nhận ASP.NET Core 2.1. Sau đó, chọn Web Application, chứa ví dụ Razor Pages. Kế tiếp, chọnCreate.

Tạo và chạy app
-
Trong Solution Explorer, Mở rộng thư mục Pages, sau đó, chọn About.cshtml.

Tập tin này trả về trang About khi xem trong trình duyệt web.

-
Trong editor, bạn sẽ thấy code HTML "additional information" trong trang About.

-
Thay đổi nội dung "additional information" thành "Hello World!".

-
Trong Solution Explorer, Mở rộng About.cshtml, sau đó, chọn About.cshtml.cs.

Bên trong code behind "application description" .

-
Thay đổi nội dung"application description" thành "What's my message?".

-
Chọn IIS Express hoặc Ctrl+F5 để chạy app.

-
Kết quả trong trình duyệt web.

-
Đóng trình duyệt.
Xem demo sau để kiểm tra công việc bạn đã hoàn thành trong phần trước.
